OpenHarmony6.0研究笔记(一):环境搭建
·
(一)硬件环境
- 一台预装Ubuntu20.04(从官网下载的带桌面版)的电脑,内存32G以上(非常关键,编译过程中内存不够会导致编译失败)、存储空间500G以上(建议至少1T)
- 开发板:Radxa Rock3a(rk3568)、一个跳线帽(两个母头)、一根USB-A对USB-A的数据线(必需,typec的不行)、一个跳线帽(两个公头末端焊接起来,烧录程序要用)
- 板载Wifi和蓝牙模块,芯片模组是AP6256
- EMMC模块,需要单独去Radxa官方商店购买,80块钱
- 一台windows电脑
(二)软件环境
window电脑安装软件
- RKDevTool_Release_v3.15 (版本号Release_v3.15,用于镜像烧录)
- Vscode (最新版,用于代码编辑)
- WindTerm (最新版,用于ssh远程连接Ubuntu电脑)
- DevEco Studio (版本 5.0.1 Release ,用于开发鸿蒙应用软件,并且带有hdc工具可用于查看日志、调试系统)
(三)安装库和工具集合
1.使用如下apt-get命令安装后续操作所需的库和工具(适用于ubuntu20.04版本):
sudo apt-get update; sudo apt-get install binutils; sudo apt-get install binutils-dev; sudo apt-get install git; sudo apt-get install git-lfs; sudo apt-get install gnupg; sudo apt-get install flex; sudo apt-get install bison; sudo apt-get install gperf; sudo apt-get install build-essential; sudo apt-get install zip; sudo apt-get install curl; sudo apt-get install zlib1g-dev; sudo apt-get install gcc-multilib; sudo apt-get install g++-multilib; sudo apt-get install libc6-dev-i386; sudo apt-get install libc6-dev-amd64; sudo apt-get install lib32ncurses5-dev; sudo apt-get install x11proto-core-dev; sudo apt-get install libx11-dev; sudo apt-get install lib32z1-dev; sudo apt-get install ccache; sudo apt-get install libgl1-mesa-dev; sudo apt-get install libxml2-utils; sudo apt-get install xsltproc; sudo apt-get install unzip; sudo apt-get install m4; sudo apt-get install bc; sudo apt-get install gnutls-bin; sudo apt-get install python3.9; sudo apt-get install python3-pip; sudo apt-get install ruby; sudo apt-get install genext2fs; sudo apt-get install device-tree-compilersudo apt-get install make; sudo apt-get install libffi-dev; sudo apt-get install e2fsprogs; sudo apt-get install pkg-config; sudo apt-get install perl; sudo apt-get install openssl; sudo apt-get install libssl-dev; sudo apt-get install libelf-dev; sudo apt-get install libdwarf-dev; sudo apt-get install u-boot-tools; sudo apt-get install mtd-utils; sudo apt-get install cpio; sudo apt-get install doxygen; sudo apt-get install liblz4-tool; sudo apt-get install openjdk-8-jre; sudo apt-get install gcc; sudo apt-get install g++; sudo apt-get install texinfo; sudo apt-get install dosfstools; sudo apt-get install mtools; sudo apt-get install default-jre; sudo apt-get install default-jdk; sudo apt-get install libncurses5; sudo apt-get install apt-utils; sudo apt-get install wget; sudo apt-get install scons; sudo apt-get install python3.9-distutils; sudo apt-get install tar; sudo apt-get install rsync; sudo apt-get install git-core; sudo apt-get install libxml2-dev; sudo apt-get install lib32z-dev; sudo apt-get install grsync; sudo apt-get install xxd; sudo apt-get install libglib2.0-dev; sudo apt-get install libpixman-1-dev; sudo apt-get install kmod; sudo apt-get install jfsutils; sudo apt-get install reiserfsprogs; sudo apt-get install xfsprogs; sudo apt-get install squashfs-tools; sudo apt-get install pcmciautils; sudo apt-get install quota; sudo apt-get install ppp; sudo apt-get install libtinfo-dev; sudo apt-get install libtinfo5; sudo apt-get install libncurses5-dev; sudo apt-get install libncursesw5; sudo apt-get install libstdc++6; sudo apt-get install gcc-arm-none-eabi; sudo apt-get install vim; sudo apt-get install ssh; sudo apt-get install locales; sudo apt-get install libxinerama-dev; sudo apt-get install libxcursor-dev; sudo apt-get install libxrandr-dev; sudo apt-get install libxi-dev
2.输入python --version,显示如下
Command 'python' not found, did you mean:

  command 'python3' from deb python3
  command 'python' from deb python-is-python3
3.解决方法:安装python-is-python3:
sudo apt update
sudo apt install python-is-python3
(四)源码获取和编译
更新软件源:
sudo apt-get update
通过以下命令安装:
sudo apt-get install git git-lfs
配置用户信息:
git config --global user.name "yourname"
git config --global user.email "your-email-address"
git config --global credential.helper store
安装curl和pip:
apt install curl
apt install python3-pip
执行如下命令安装gitcode的repo工具,下述命令中的安装路径以"~/bin"为例,请用户自行创建所需目录:
mkdir ~/bin
curl https://raw.gitcode.com/gitcode-dev/repo/raw/main/repo-py3 -o ~/bin/repo
chmod a+x ~/bin/repo
pip3 install -i https://repo.huaweicloud.com/repository/pypi/simple requests
将repo添加到环境变量
vim ~/.bashrc               # 编辑环境变量,若提示无vim,可以使用nano ~/.bashrc
export PATH=~/bin:$PATH     # 在环境变量的最后添加一行repo路径信息
source ~/.bashrc            # 应用环境变量
拉取Openharmony源码
cd ~
mkdir ohos_6.0_release       # 在根目录下新建ohos_6.0_release路径
cd ohos_6.0_release          # 进入ohos_6.0_release路径拉取代码

# 以下命令确保当前已在源码目录下(ohos_6.0_release)再执行
repo init -u https://gitee.com/openharmony/manifest -b refs/tags/OpenHarmony-v6.0-Release --no-repo-verify
repo sync -c # 此命令开始拉取代码,需要等待较长时间
repo forall -c 'git lfs pull'
执行prebuilts
./build/prebuilts_download.sh # 确保当前已在源码目录下(ohos_6.0_release)
源码编译:第一次全量编译(不使用缓存,指定内核版本5.10)
# 若不加--gn-args linux_kernel_version="linux-5.10"参数,Openharmony6.0默认使用6.6版本的内核
./build.sh --product-name rk3568 --gn-args linux_kernel_version="linux-5.10"
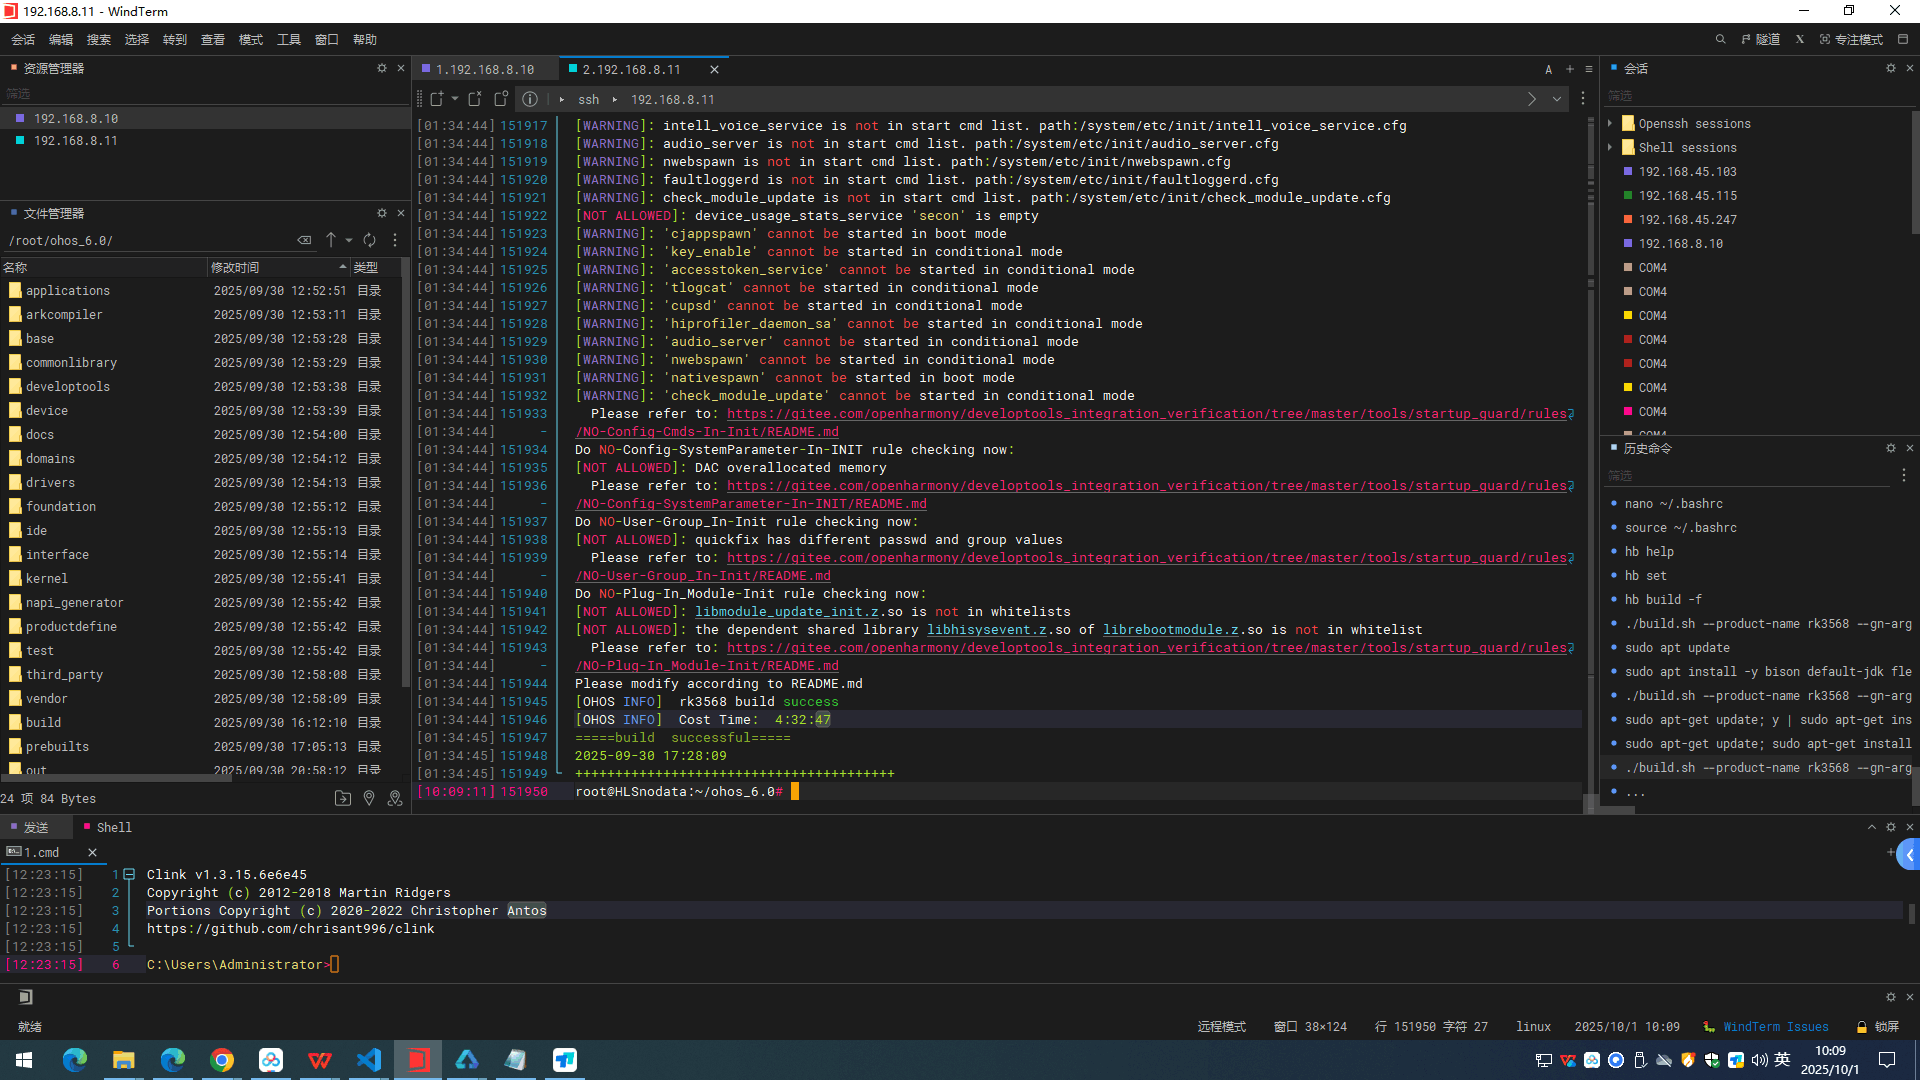
编译成功提示

社区规范:仅讨论OpenHarmony相关问题。
更多推荐
 0
0 1
1- 0


 已为社区贡献3条内容

所有评论(0)