Hvigor 构建自动化部署脚本(二) 自定义Hvigor任务
自定义任务介绍 创建一个自定义任务工程,并且实现一个基础的任务流程 将自定义任务注册到harmony工程中的module中并执行 1、创建自定义任务工程 安装相应的nodejs与npm(可以用安装环境后默认自带的node环境)安装typescript环境(npm install -g typescript)新建一个harmony
·
自定义任务介绍
-
创建一个自定义任务工程,并且实现一个基础的任务流程
-
将自定义任务注册到harmony工程中的module中并执行
1、创建自定义任务工程
- 安装相应的nodejs与npm(可以用安装环境后默认自带的node环境)
- 安装typescript环境(npm install -g typescript)
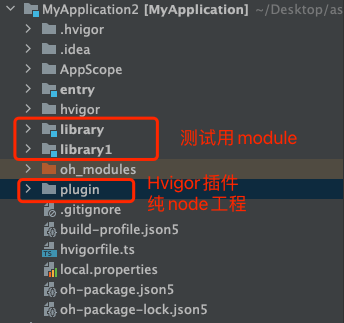
- 新建一个harmony工程,并且在工程内创建两个演示module,以及一个Hvigor的plugin工程,并且在plugin目录下通过tsc --init和npm init初始化node工程,通过npm命令行安装hvigor 与 hvigor-ohos-plugin(安装前需要添加.npmrc文件,详情可参考 Hvigor 构建自动化部署脚本(一) Hvigor介绍以及使用)
npm install @ohos/hvigor
npm install @ohos/hvigor-ohos-plugin

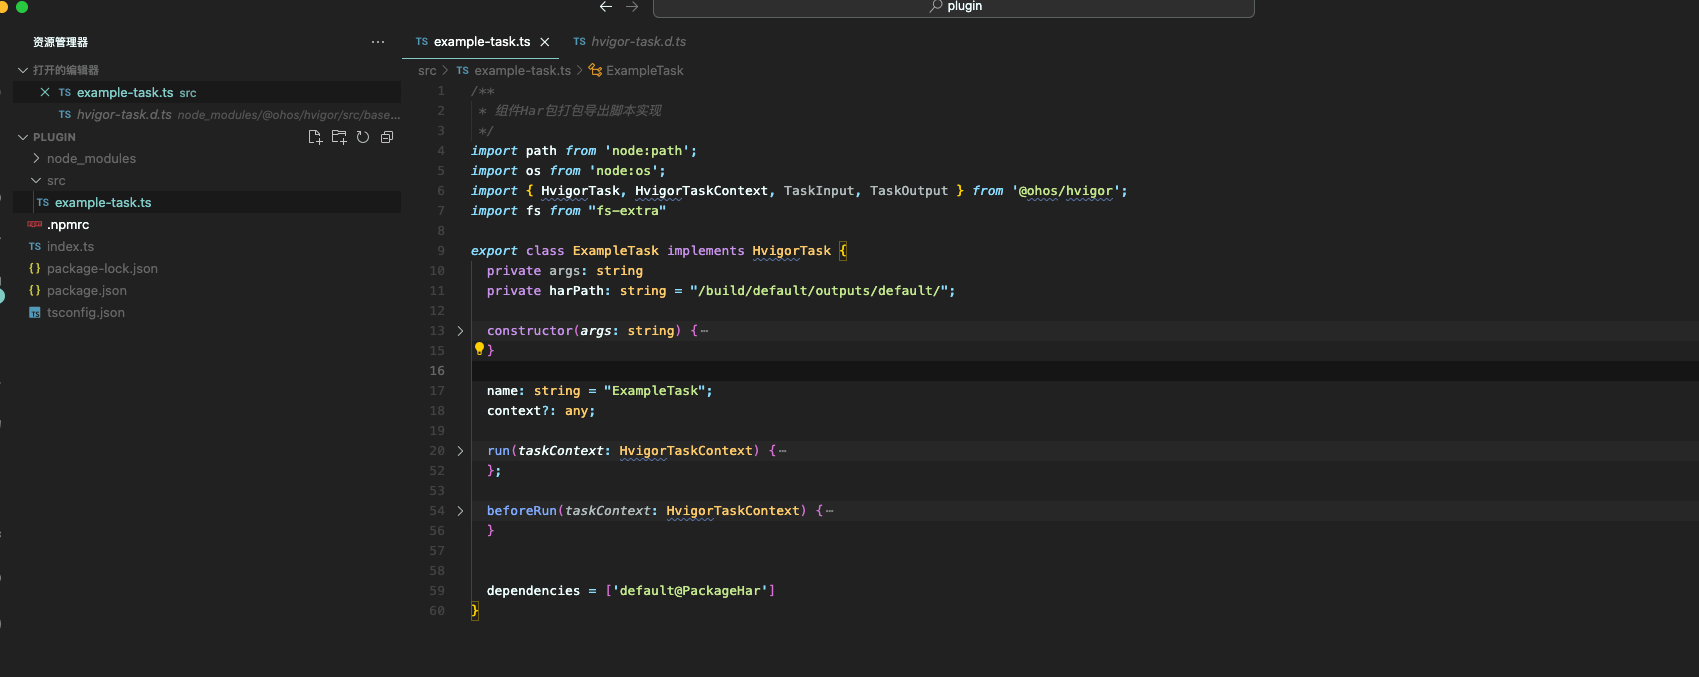
我们可以直接用vscode将plugin工程打开,并且创建我们自定义任务,工程结构如下:

自定义任务需要实现HvigorTask接口,并且实现内部的方法,接口详情如下:
export interface HvigorTask {
    /**
     * 任务名称,全局唯一
     */
    name: string;
    /**
     * task 上下文
     */
    context?: (() => any) | any;
    /**
     * Task 定义增量输入接口
     *
     * @param input
     */
    input?: (input: TaskInput) => void;
    /**
     * task 定义增量输出接口
     *
     * @param output
     */
    output?: (output: TaskOutput) => void;
    /**
     * task beforeRun 在run方法之前执行
     *
     * @param taskContext
     */
    beforeRun?: (taskContext: HvigorTaskContext) => void | Promise<void>;
    /**
     * 增量输入输出
     *
     * @param taskContext
     */
    afterRun?: (taskContext: HvigorTaskContext) => void | Promise<void>;
    /**
     * Task执行逻辑,执行时调用此方法
     *
     * @param taskContext
     */
    run: (taskContext: HvigorTaskContext) => void | Promise<void>;
    /**
     * 当前Task依赖的Task列表
     * 前置依赖的tasks, 先执行前置依赖,再执行此task
     */
    dependencies?: (() => string[]) | string[];
    /**
     * 后置依赖的tasks, 执行后置依赖前,必须先执行此task
     */
    postDependencies?: (() => string[]) | string[];
}
我们主要需要实现run方法,这个是当执行到我们任务时任务的主要功能,并且声明任务处于任务链中的环节通过设置dependencies设置前置和后置依赖,下面是一个演示任务,作用于harmony工程中的module级工程,可以实现编译并且自动拷贝har包到sdk文件内
/**
 * 组件Har包打包导出脚本实现
 */
import path from 'node:path';
import os from 'node:os';
import { HvigorTask, HvigorTaskContext, TaskInput, TaskOutput } from '@ohos/hvigor';
import fs from "fs-extra"

export class ExampleTask implements HvigorTask {
  private harPath: string = "/build/default/outputs/default/";

  constructor() {
  }

  name: string = "ExampleTask";
  context?: any;

  run(taskContext: HvigorTaskContext) {

    console.log(taskContext.modulePath);

    function getHarInfo() {
      try {
        let res = fs.readJSONSync(path.join(taskContext.modulePath, "oh-package.json5"))
        return { "name": res.name, "version": res.version }
      } catch (e) {
        console.log(e);
      }
    }

    let harInfo = getHarInfo();
    let source = path.join(taskContext.modulePath, this.harPath, harInfo!.name + ".har");

    let type = "";
    if (os.platform() === "win32") {
      type = taskContext.modulePath.replace("\\" + harInfo?.name, "")
        .substring(taskContext.modulePath.replace("\\" + harInfo?.name, "").lastIndexOf("\\"))
    } else {
      type = taskContext.modulePath.replace("/" + harInfo?.name, "")
        .substring(taskContext.modulePath.replace("/" + harInfo?.name, "").lastIndexOf("/"))
    }
    console.log("bundle", taskContext.modulePath.replace("/" + harInfo?.name, ""), "type", type);
    if (!fs.existsSync(path.join(taskContext.modulePath, "/sdk/", type))) {
      fs.mkdirSync(path.join(taskContext.modulePath, "/sdk/", type), { recursive: true })
    }
    let dist = path.join(taskContext.modulePath, "/sdk/", harInfo!.name + "-" + harInfo?.version + ".har")
    console.log("开始拷贝输出文件", source, dist);
    fs.copyFileSync(source, dist)
  };

  beforeRun(taskContext: HvigorTaskContext) {
    this.dependencies = ['default@PackageHar']
  }


  dependencies = ['default@PackageHar']
}
2、将自定义任务注册到harmony工程中的module中并执行
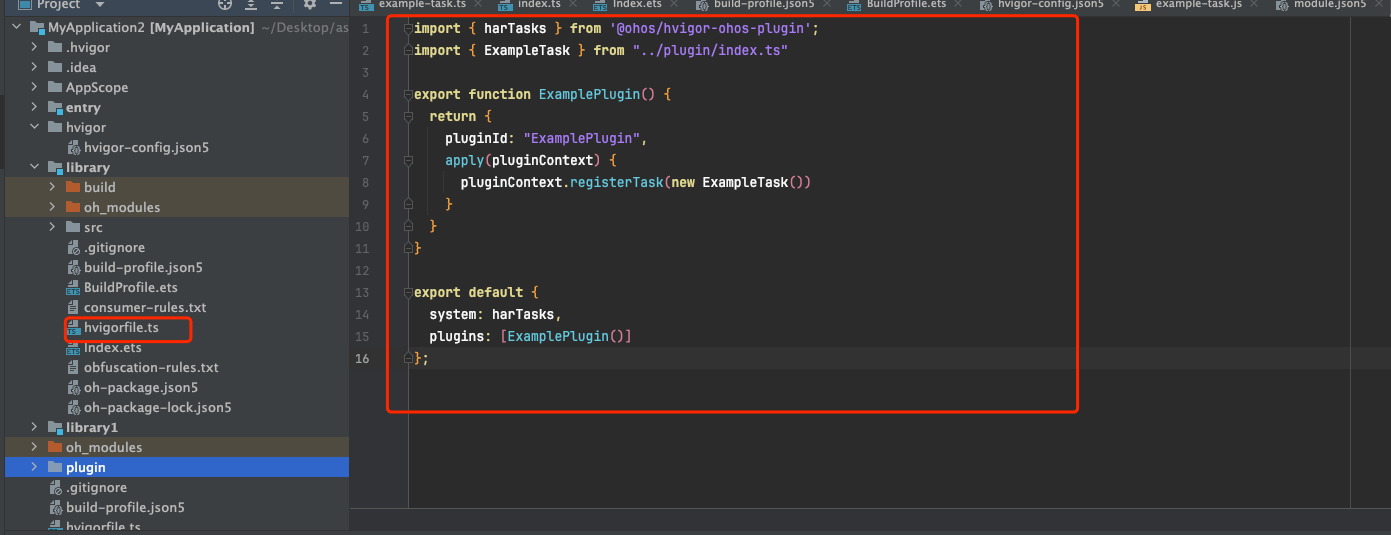
在需要增加任务的module下hvigorfile.ts中增加任务注册
如下图所示:

import { harTasks } from '@ohos/hvigor-ohos-plugin';
import { ExampleTask } from "../plugin/index.ts"

export function ExamplePlugin() {
  return {
    pluginId: "ExamplePlugin",
    apply(pluginContext) {
      pluginContext.registerTask(new ExampleTask())
    }
  }
}

export default {
  system: harTasks,
  plugins: [ExamplePlugin()]
};
注册一个任务名称为ExamplePlugin的任务,并且导出任务级别为harTasks等级,注册后可以通过命令hvigorw(windows为hvigorw.bat) --mode module -p product=default -p module=library@default ExampleTask 执行任务
执行成功后控制台显示

更多推荐
 已为社区贡献16条内容


所有评论(0)