rk3568开发板4.0 Release版本cpu点屏过程总结
基于4.0Release版本和rk3568的开发板进行CPU点屏。 建议:使用未作修改的代码完成以下修改,改完之后再进行编译。 关闭GPU点屏功能 路径: foundation\graphic\graphic_2d\graphic_config.gni productdefine\common\inherit\rich.json productdefine\common
基于4.0Release版本和rk3568的开发板进行CPU点屏。
建议:使用未作修改的代码完成以下修改,改完之后再进行编译。
切换为CPU点屏
路径:
foundation\graphic\graphic_2d\graphic_config.gni
productdefine\common\inherit\rich.json
productdefine\common\inherit\chipset_common.json
修改graphic_2d_feature_ace_enable_gpu配置为false:
graphic_2d_feature_ace_enable_gpu = false
这里的两个inherit文件,可以看作两个模板,配置了不同的子系统集,在config.json中被继承,如下所示:
{
 ......
"inherit": [ "productdefine/common/inherit/rich.json", "productdefine/common/inherit/chipset_common.json" ],
 ......
}
修改子系统配置时也需要关注
去除GPU相关依赖
修改之后如有以下报错,请进行下一步:

disenable GPU后,还有些GPU相关的功能需要关闭,如eglimage
路径: foundation\graphic\graphic_2d\graphic_config.gni
graphic_2d_feature_rs_enable_eglimage = false
去除依赖GPU功能的组件
修改之后如有以下报错,请进行下一步:

除了GPU的依赖,还有些组件依赖了GPU相关能力,需要关闭。
路径一: productdefine\common\inherit\chipset_common.json
productdefine\common\inherit\rich.json
将所有与fingerprint_auth有关的全部删除
\\productdefine\common\inherit\chipset_common.json
         {
          "component": "fingerprint_auth",
          "features": []
        }

        {
         "component": "drivers_interface_fingerprint_auth",
         "features": []
        },

\\productdefine\common\inherit\chipset_common.json
        {
          "component": "drivers_peripheral_fingerprint_auth",
          "features": []
        },
报以下错误时,关闭ace_engine_feature_enable_web功能:
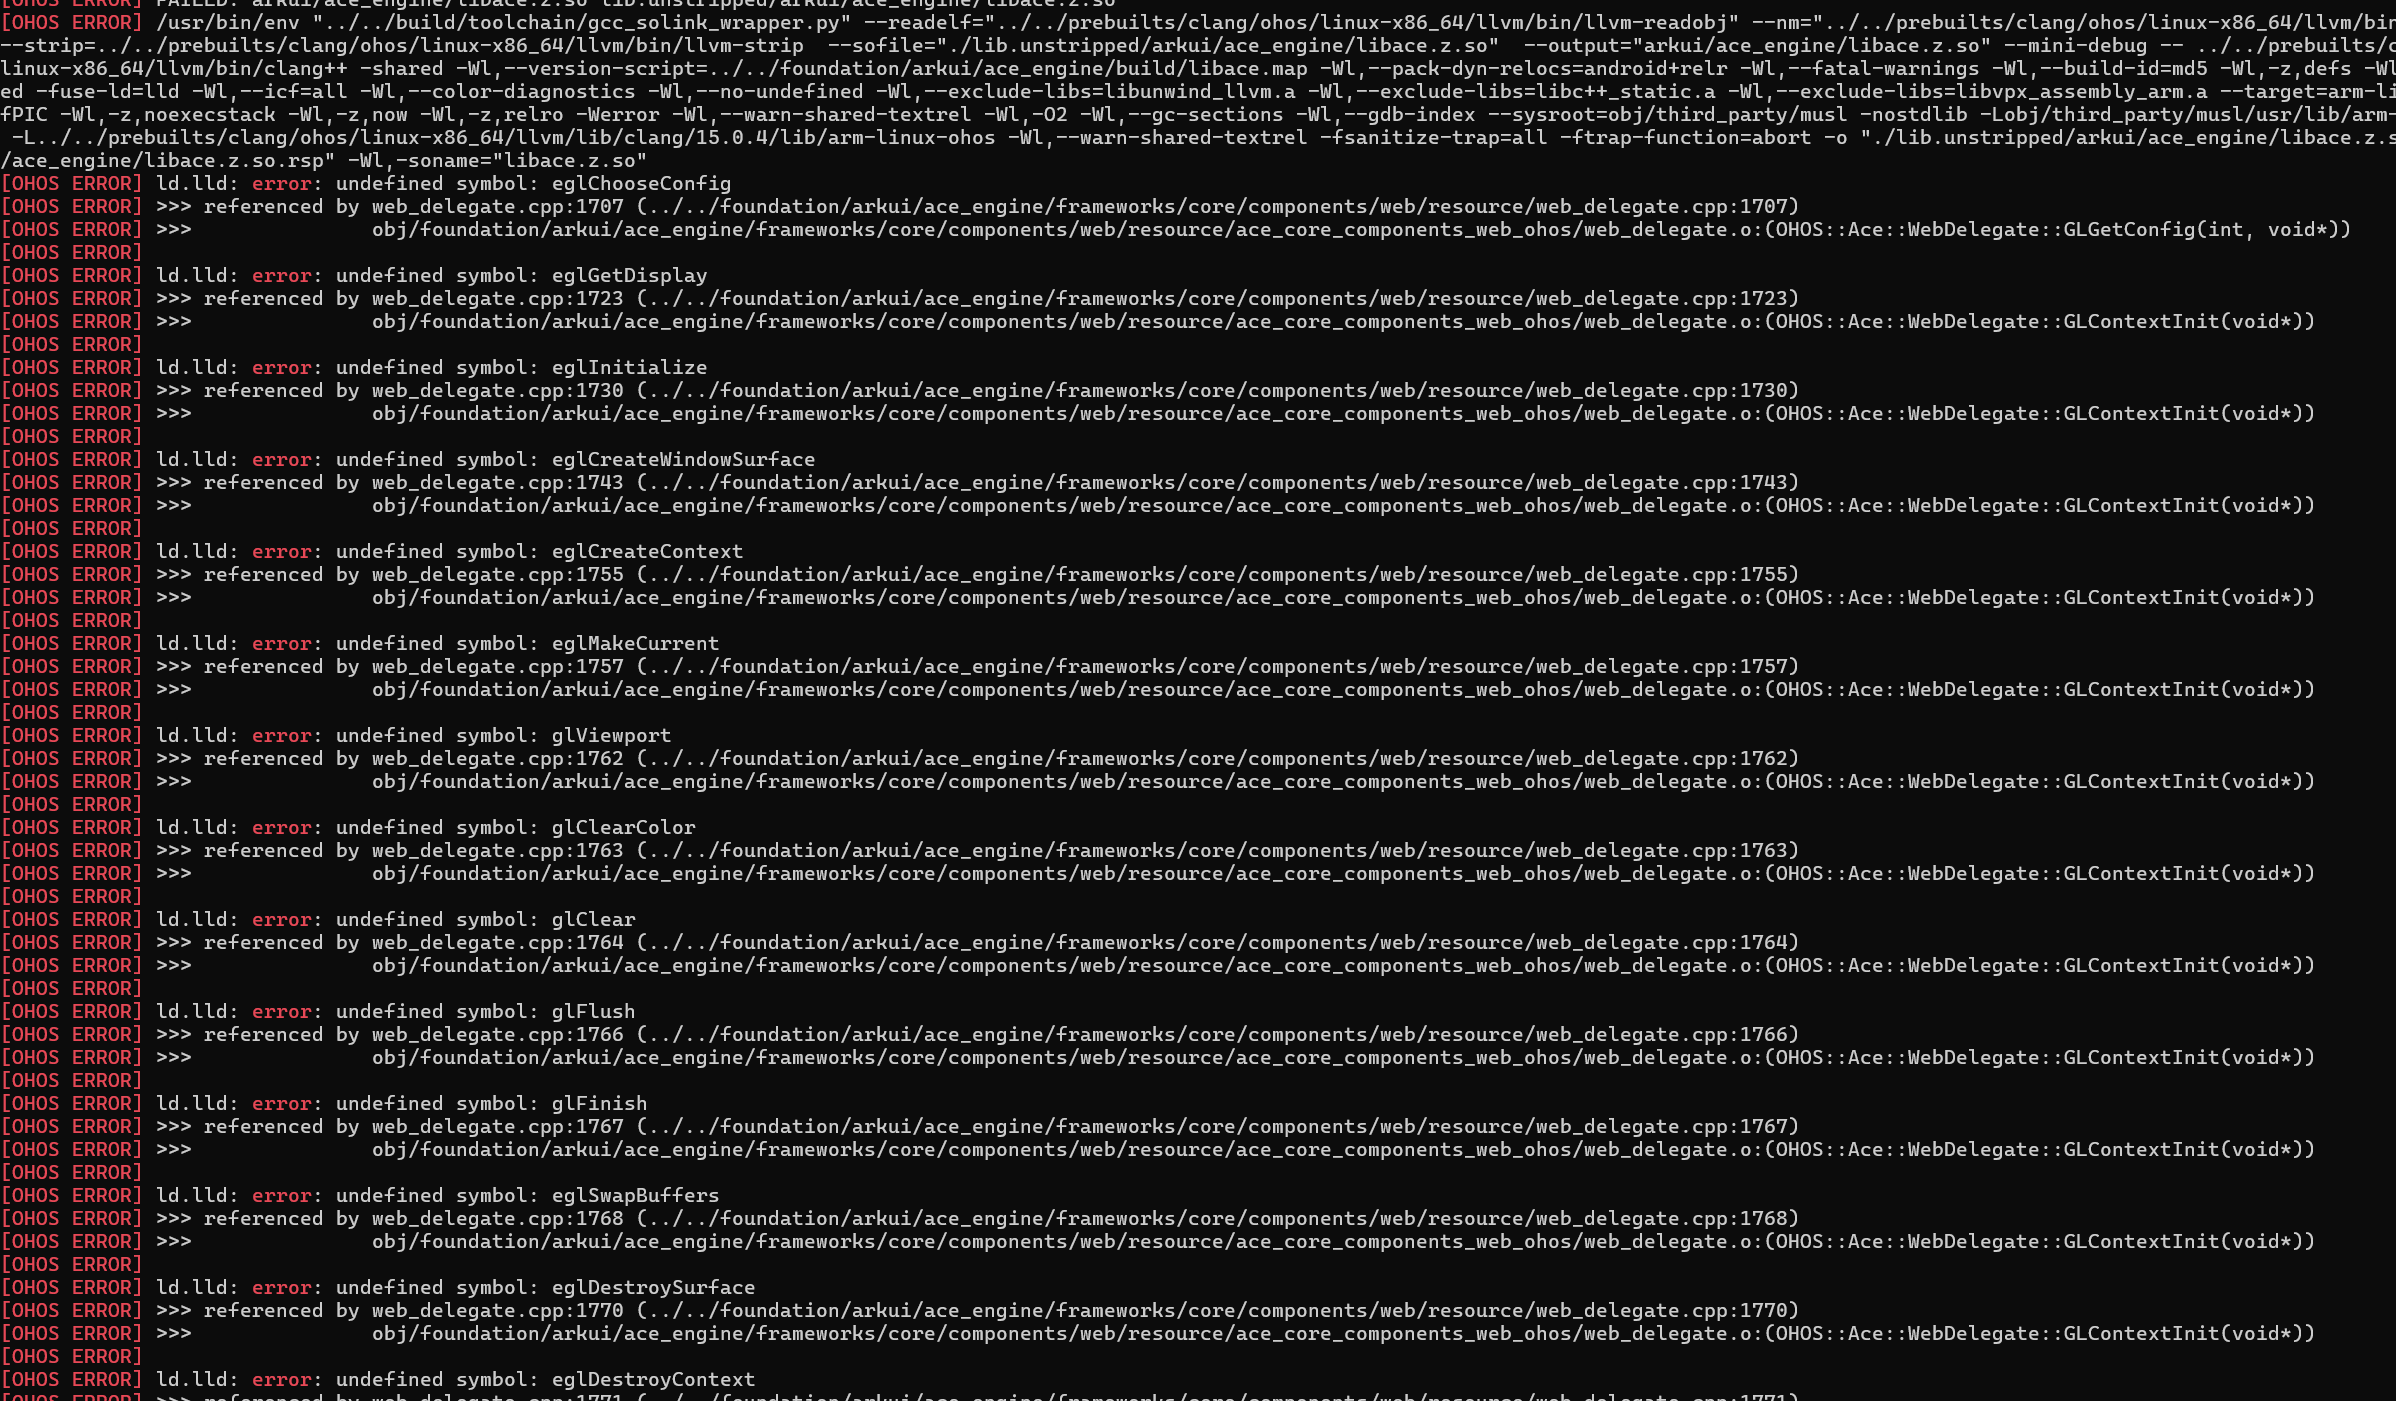
路径二:vendor\hihope\rk3568\config.json
     "subsystem": "arkui",
     "components": [
       {
         "component": "ace_engine",
         "features": [
           "ace_engine_feature_enable_accessibility = true",
           "ace_engine_feature_enable_web = false"
         ]
       },
修改代码
修改合成方式
需要注意的有两个:device/soc/rockchip/rk3568/hardware/display/src/display_device/hdi_gfx_composition.cpp路径下的两个接口:
CanHandle接口,
bool HdiGfxComposition::CanHandle(HdiLayer &hdiLayer)
{
    DISPLAY_LOGI();
    (void)hdiLayer;
    return true;
    // return false;
}
Apply接口,实现一个简单的合成操作。需要包含display_buffer_vdi_impl.h头文件,否则会报IDisplayBufferVdi相关错误。
 int32_t HdiGfxComposition::Apply(bool modeSet)
 {
+    StartTrace(HITRACE_TAG_HDF, "HDI:DISP:Apply");
     int32_t ret;
-    DISPLAY_DEBUGLOG("composer layers size %{public}zd", mCompLayers.size());
+    static std::shared_ptr<IDisplayBufferVdi> g_buffer = nullptr;
+    DISPLAY_LOGD("map composer layers size %{public}zd", mCompLayers.size());
     for (uint32_t i = 0; i < mCompLayers.size(); i++) {
         HdiLayer *layer = mCompLayers[i];
         CompositionType compType = layer->GetCompositionType();
@@ -185,15 +215,39 @@ int32_t HdiGfxComposition::Apply(bool modeSet)
                     DISPLAY_LOGE("clear layer %{public}d failed", i));
                 break;
             case COMPOSITION_DEVICE:
-                ret = BlitLayer(*layer, *mClientLayer);
-                DISPLAY_CHK_RETURN((ret != DISPLAY_SUCCESS), DISPLAY_FAILURE,
-                    DISPLAY_LOGE("blit layer %{public}d failed ", i));
+                // ret = BlitLayer(*layer, *mClientLayer);
+                // DISPLAY_CHK_RETURN((ret != DISPLAY_SUCCESS), DISPLAY_FAILURE,
+                //     DISPLAY_LOGE("blit layer %{public}d failed ", i));
+                {
+                    if (g_buffer== nullptr) {
+                        IDisplayBufferVdi* dispBuf = new DisplayBufferVdiImpl();
+                        DISPLAY_CHK_RETURN((dispBuf == nullptr), DISPLAY_FAILURE, DISPLAY_LOGE("map dispBuf init failed"));
+                        g_buffer.reset(dispBuf);
+                        DISPLAY_LOGD("map new DisplayBufferVdiImpl");
+                    }
+                    char *clientBuff = (char *)g_buffer->Mmap(mClientLayer->GetCurrentBuffer()->mHandle);
+                    if(clientBuff) {
+                        DISPLAY_LOGD("map in int");
+                        HdiLayerBuffer *hdiLayer = layer->GetCurrentBuffer();
+                        char *layerBuff = (char *)g_buffer->Mmap(hdiLayer->mHandle);
+                        for(int y = 0; y < hdiLayer->GetHeight(); y++) {
+                            memcpy(&clientBuff[mClientLayer->GetCurrentBuffer()->GetStride() *
+                            (y + layer->GetLayerDisplayRect().y) + layer->GetLayerDisplayRect().x * 4],
+                            (char *)(&layerBuff[hdiLayer->GetStride() * y]), hdiLayer->GetStride());
+                        }
+                        g_buffer->Unmap(hdiLayer->mHandle);
+                        g_buffer->Unmap(mClientLayer->GetCurrentBuffer()->mHandle);
+                    } else {
+                        DISPLAY_LOGD("map in err");
+                    }
+                }
                 break;
             default:
                 DISPLAY_LOGE("the gfx composition can not surpport the type %{public}d", compType);
                 break;
         }
     }
+    FinishTrace(HITRACE_TAG_HDF);
     return DISPLAY_SUCCESS;
 }
modetest测试
modetest是DRM提供的一个测试工具集,用于检验DRM驱动是否适配成功。
- 为modetest新建BUILD.gn文件
路径:third_party/libdrm/tests/modetest/BUILD.gn:
import("//build/ohos.gni")
ohos_executable("modetest") {
  sources = [
    "buffers.c",
    "cursor.c",
    "modetest.c",
  ]

  cflags = [
      "-Wno-pointer-arith",
  ]

  include_dirs = [
    "../",
    ".",
  ]

  configs = [ "//third_party/libdrm:libdrm_config" ]

  public_configs = [ "//third_party/libdrm:libdrm_public_config" ]

  deps = [
    "//third_party/libdrm:libdrm",
    "//third_party/libdrm/tests/util/:util",
  ]

  public_deps = []

  install_images = [
    "system",
    "updater",
  ]
  part_name = "graphic_2d"    #注意
  subsystem_name = "graphic"
}
注意:3.2Release中配置为
part_name = "graphic_standard", 而在4.0Release中,由于graphic的代码结构改变,应该配置为part_name = "graphic_2d"。
- 添加依赖
路径:third_party\libdrm\tests\util\BUILD.gn
import("//build/ohos.gni")

ohos_static_library("util") {

  sources = [
    "format.c",
    "kms.c",
    "pattern.c",
  ]

  cflags = []

  include_dirs = [
    "../",
    ".",
  ]

  configs = [ "//third_party/libdrm:libdrm_config" ]

  public_configs = [ "//third_party/libdrm:libdrm_public_config" ]

  deps = [
    "//third_party/libdrm:libdrm",
  ]

  public_deps = []
}
- 加入编译框架,添加到graphic依赖项
路径:foundation/graphic/graphic_2d/bundle.json
diff --git a/bundle.json b/bundle.json
index 755e6d2..f1bb7ef 100755
--- a/bundle.json
+++ b/bundle.json
@@ -56,6 +56,8 @@
         "group_type": {
           "base_group": [
             "//third_party/libpng:libpng",

+            "//third_party/libdrm/tests/util:util",
+            "//third_party/libdrm/tests/modetest:modetest",
             "//foundation/graphic/graphic_2d/interfaces/kits/napi:napi_packages",
             "//foundation/graphic/graphic_2d/rosen/modules/composer:libcomposer",
             "//foundation/graphic/graphic_2d/rosen/modules/composer/native_vsync:libnative_vsync",
- 解决编译问题
问题1:依赖不可见
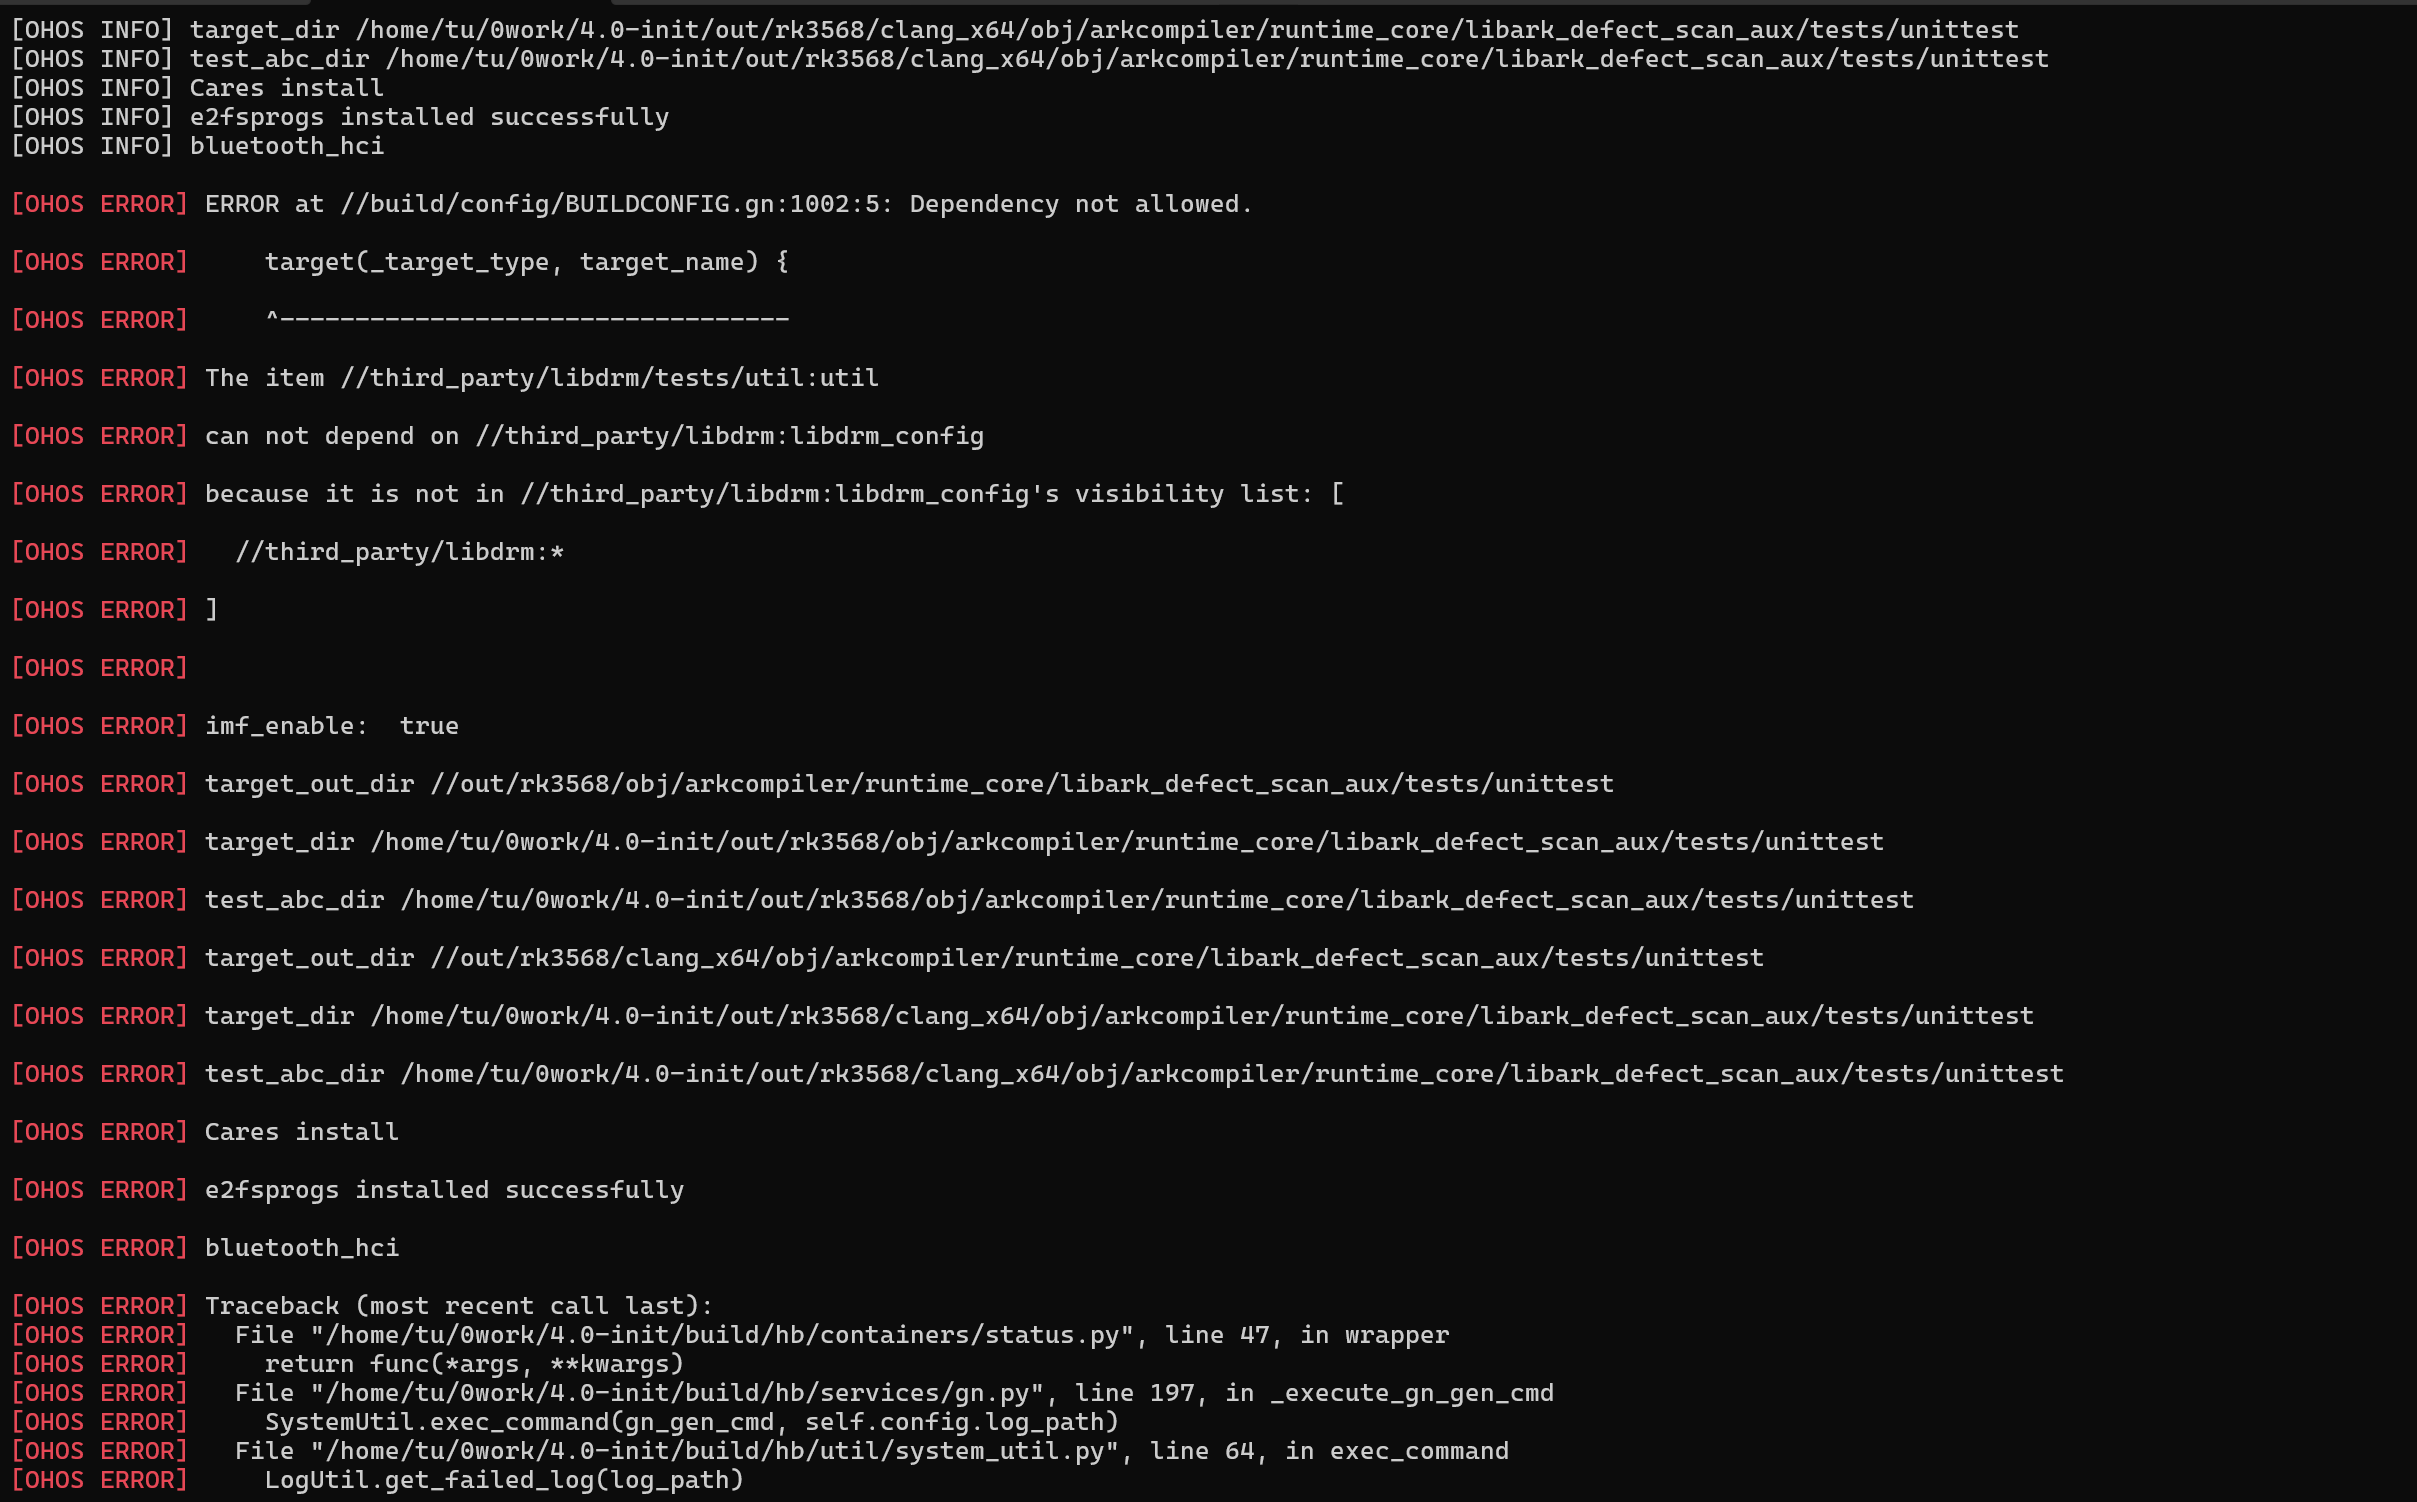
路径:third_party/libdrm/BUILD.gn
修改点:添加util的可见性。
config("libdrm_config") {
  visibility = [ ":*",
  "tests/util:*",
   "tests/modetest:*" ]
  ......
}
问题2:添加三方库依赖
路径:foundation/graphic/graphic_2d/bundle.json
修改点:third_party添加libdrm、modetest依赖。
{
  ......
"third_party": [
    "flutter",
    "libuv",
    "openssl",
    "libxml2",
    "bounds_checking_function",
    "icu",
    "libpng",
    "zlib",
    "skia",
    "cJSON",
    "jsoncpp",
    "egl",
    "opengles",
    "vulkan-headers",
    "vulkan-loader",
    "libdrm",
    "modetest"
  ]
......
}
注意:4.1Release可能还有build/bundle.json的依赖问题(4.0中没有这个文件),解决方法在此报错的bundle.json中的third_party添加libdrm和util即可。
- 运行测试
编译生成路径:out/yangfan/obj/third_party/libdrm/tests/modetest/modetest
- IOCTL方式
/system/bin/modetest -M rockchip -s 123@68:720x1280
-M 指定drm驱动名称
-s 指定屏幕信息
   123:connector id
   68: crtc id
   720x1280: 屏幕分辨率
- atomic方式(OHOS Display HDI使用的方式)
modetest -M rockchip -D 0 -a -s 123@68:720x1280 -P 54@68:720x1280
-M 指定drm驱动名称
-s 指定屏幕信息
   123:connector id
   68: crtc id
   720x1280: 屏幕分辨率
-P 指定plane信息
   54: 可用的plane id
   68: crtc id
   720x1280: plane大小
由于HDI使用的是atomic方式,我们需要使用atomic方式测试drm接口成功,才能确保HDI正常使用。
- 直接运行modetest可以获取所有参数:
     /system/bin/modetest
    ……
Encoders:
id      crtc    type    possible crtcs  possible clones
120     0       Virtual 0x00000003      0x00000001
122     0       TMDS    0x00000001      0x00000002
135     85      DSI     0x00000002      0x00000004

Connectors:
id      encoder status          name            size (mm)       modes   encoders
123     0       disconnected    HDMI-A-1        0x0             0       122
    ……
如果遍历了所有驱动后都找不到合适的驱动名称就退出了,而无法运行,就需要使用-D来指定dri的名称。
查看dri设备信息
ls -l /dev/dri/by-path/
total 0
lrwxrwxrwx l root system 8 2017-08-07 13:34 platform-display-subsystem-card -> ../card0
lrwxrwxrwx l root system 8 2017-08-07 13:33 platform-display-subsystem-render -> ../renderD128
就可以使用“-D display-subsystem”来替换“-M rockchip”。
modetest -D display-subsystem -a -s 123@68:720x1080 -P 54@68:720x1080
正常情况下会有如下显示:
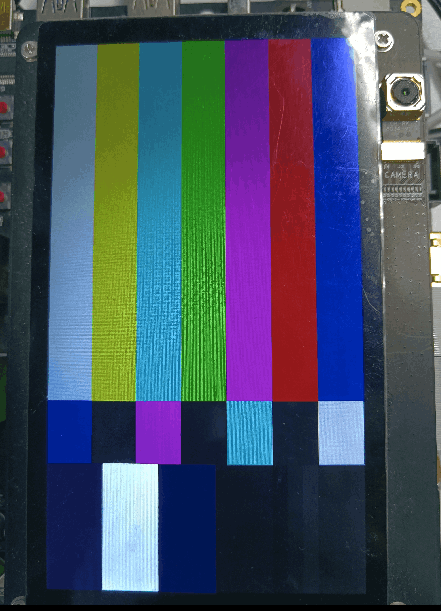
注意:这里的参数 123@68:720x1080 指定的是HDMI屏幕,需要接HDMI显示,如果测试其他屏请按实际情况修改参数。
hello_composer测试
hello_composer是HDI接口的测试工具,用于检验HDI接口是否适配成功。
路径:foundation/graphic/graphic_2d/bundle.json
diff --git a/bundle.json b/bundle.json
index 755e6d2..28bc995 100755
--- a/bundle.json
+++ b/bundle.json
@@ -63,6 +63,7 @@
             "//foundation/graphic/graphic_2d/rosen/samples/2d_graphics:drawing_sample_rs",
             "//foundation/graphic/graphic_2d/rosen/samples/2d_graphics:drawing_engine_sample",
             "//foundation/graphic/graphic_2d/rosen/samples/2d_graphics/test:drawing_sample",

+"//foundation/graphic/graphic_2d/rosen/samples/composer:hello_composer",
"//foundation/graphic/graphic_2d/rosen/modules/effect/effectChain:libeffectchain",
"//foundation/graphic/graphic_2d/rosen/modules/effect/color_picker:color_picker",
"//foundation/graphic/graphic_2d/rosen/modules/effect/skia_effectChain:skeffectchain",
编译生成路径:out/yangfan/packages/phone/vendor/bin/hello_composer
执行./hello_composer
成功会有如下显示:
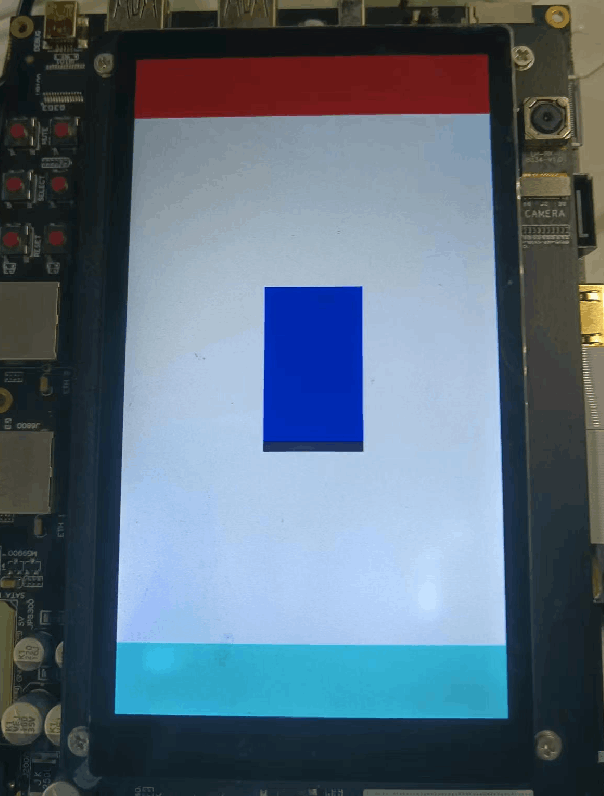
注意:
1.如果不能显示图形,请根据hello_composer的打印,检查hdi接口适配情况。
2.如果是从黑屏慢慢变为蓝屏,需要注意:
CanHandle接口,执行hello_composer需要返回true;进行CPU点屏需要返回false。
Apply接口,合成方式。
问题定位策略
- 确认drm驱动适配是否正常:运行modetest测试,参考前文"modetest测试"章节。
- 确认hdi接口适配是否正常:运行hello_composer测试,参考前文"hello_composer测试"章节。
- 确认图形相关应用、服务是否正常:例如开机后进入不了launcher问题,就需要执行
ps -ef | grep com命令,确保至少com.ohos.launcher和com.ohos.systemui这两个系统应用要启动正常。# ps -ef | grep com root 79 2 0 12:29:15 ? 00:00:00 [kcompactd0] root 207 2 0 12:29:17 ? 00:00:00 [mmc_complete] root 237 2 0 12:29:18 ? 00:00:00 [krfcommd] 10008 1819 311 6 12:29:29 ? 00:00:01 com.ohos.systemui 20010026 2026 311 0 12:29:31 ? 00:00:00 com.ohos.telephonydataability 20010043 2079 311 12 12:29:32 ? 00:00:02 com.ohos.launcher 10006 2099 311 2 12:29:32 ? 00:00:00 com.example.kikakeyboard:inputMethod 20010033 2109 311 1 12:29:32 ? 00:00:00 com.ohos.medialibrary.medialibrarydata root 2223 2216 15 12:29:53 pts/0 00:00:00 grep com. #
问题记录
1. 如果报以下错误,需要将out以及生成的文件全部删除,重新编译。
原因:首次编译成功后,out中会生成一些文件,记录依赖,删除fingerprint_auth组件之后,out中的一些配置文件并没有修改,编译时找不到对应文件导致报错。

2. 运行hello_composer蓝屏。
前文hello_composer章节已经提到过。
3. 播放完开机动画后,不能进入桌面。
问题现象:
- 播放完开机动画后,停留在开机OpenHarmony界面不能进入桌面,但是解锁后点击应用正常出现应用界面。
- 串口和hilog打印中打印如下log:
......
[   46.572457] audit: type=1400 audit(1501928527.476:334): avc:  denied  { call } for  pid=605 comm="TaskExecutor" scontext=u:r:distributeddata:s0 tcontext=u:r:netmanager:s0 tclass=binder permissive=0
[   47.084814] audit: type=1400 audit(1501928527.990:335): avc:  denied  { call } for  pid=605 comm="TaskExecutor" scontext=u:r:distributeddata:s0 tcontext=u:r:netmanager:s0 tclass=binder permissive=0
[   47.352681] audit: type=1400 audit(1501928528.256:336): avc:  denied  { getopt } for  pid=621 comm="render_service" scontext=u:r:render_service:s0 tcontext=u:r:render_service:s0 tclass=unix_dgram_socket permissive=0
[   47.352762] audit: type=1400 audit(1501928528.256:337): avc:  denied  { setopt } for  pid=621 comm="render_service" scontext=u:r:render_service:s0 tcontext=u:r:render_service:s0 tclass=unix_dgram_socket permissive=0
[   47.352806] audit: type=1400 audit(1501928528.256:338): avc:  denied  { getopt } for  pid=621 comm="render_service" scontext=u:r:render_service:s0 tcontext=u:r:render_service:s0 tclass=unix_dgram_socket permissive=0
[   47.596342] audit: type=1400 audit(1501928528.500:339): avc:  denied  { call } for  pid=605 comm="TaskExecutor" scontext=u:r:distributeddata:s0 tcontext=u:r:netmanager:s0 tclass=binder permissive=0
.......
- avc:denied:访问被拒绝。
- permissive=0:处于强制模式,即如果不满足安全策略,就拒绝访问。
问题原因:
推测可能是改用CPU进行点屏之后,此操作不在安全策略范围内,导致安全策略拒绝拉起launcher服务。
由于selinux模块比较复杂,还没搞清楚具体是哪里对launcher产生影响。所以目前给出的解决方案都是以关闭selinux或采用宽容安全策略为主。后续找到关键问题点再优化解决方案。
解决方案
- 临时方案:hdc执行
setforence 0,将安全策略置为宽松策略,重启之后会恢复。 - 修改
config.json配置:vendor目录对应的产品config.json文件中将build_selinux置为false,关闭selinux。 - 修改gni文件:路径
base/security/selinux_adapter/selinux.gni,将selinux_enforce = true置为false,关闭selinux。
参考资料
OpenHarmony中SELinux使用详解_小~Q-Laval社区 (csdn.net)
OpenHarmony SELinux的主代码仓
4. 3588 CPU点屏不显示图形。
不显示图形原因有很多,此案例讲述planetype配置不正确情景,每家芯片厂商实现drm的方式不一样,可能没有下面这些配置,请注意!
路径:device/soc/rockchip/rk3568/hardware/display/src/display_device/drm_plane.cpp
device/soc/rockchip/rk3568/hardware/display/src/display_device/drm_plane.h
struct PlaneTypeName planeTypeNames[] = {
    { DrmPlaneType::DRM_PLANE_TYPE_CLUSTER0_WIN0, "Cluster0-win0" },
    { DrmPlaneType::DRM_PLANE_TYPE_CLUSTER0_WIN1, "Cluster0-win1" },
    { DrmPlaneType::DRM_PLANE_TYPE_CLUSTER1_WIN0, "Cluster1-win0" },
    { DrmPlaneType::DRM_PLANE_TYPE_CLUSTER1_WIN1, "Cluster1-win1" },

    { DrmPlaneType::DRM_PLANE_TYPE_ESMART0_WIN0, "Esmart0-win0" },
    { DrmPlaneType::DRM_PLANE_TYPE_ESMART0_WIN1, "Esmart0-win1" },
    { DrmPlaneType::DRM_PLANE_TYPE_ESMART0_WIN2, "Esmart0-win2" },
    { DrmPlaneType::DRM_PLANE_TYPE_ESMART0_WIN3, "Esmart0-win3" },

    { DrmPlaneType::DRM_PLANE_TYPE_ESMART1_WIN0, "Esmart1-win0" },
    { DrmPlaneType::DRM_PLANE_TYPE_ESMART1_WIN1, "Esmart1-win1" },
    { DrmPlaneType::DRM_PLANE_TYPE_ESMART1_WIN2, "Esmart1-win2" },
    { DrmPlaneType::DRM_PLANE_TYPE_ESMART1_WIN3, "Esmart1-win3" },

    { DrmPlaneType::DRM_PLANE_TYPE_SMART0_WIN0, "Smart0-win0" },
    { DrmPlaneType::DRM_PLANE_TYPE_SMART0_WIN1, "Smart0-win1" },
    { DrmPlaneType::DRM_PLANE_TYPE_SMART0_WIN2, "Smart0-win2" },
    { DrmPlaneType::DRM_PLANE_TYPE_SMART0_WIN3, "Smart0-win3" },

    { DrmPlaneType::DRM_PLANE_TYPE_SMART1_WIN0, "Smart1-win0" },
    { DrmPlaneType::DRM_PLANE_TYPE_SMART1_WIN1, "Smart1-win1" },
    { DrmPlaneType::DRM_PLANE_TYPE_SMART1_WIN2, "Smart1-win2" },
    { DrmPlaneType::DRM_PLANE_TYPE_SMART1_WIN3, "Smart1-win3" },

    { DrmPlaneType::DRM_PLANE_TYPE_Unknown, "unknown" },
};
-
如果缺少Smart0和Smart1两个图层配置,会导致rk系列平台,在4.0版本上卡在内核logo显示界面;在4.1版本上卡在内核logo一段时间后,反复重启。
-
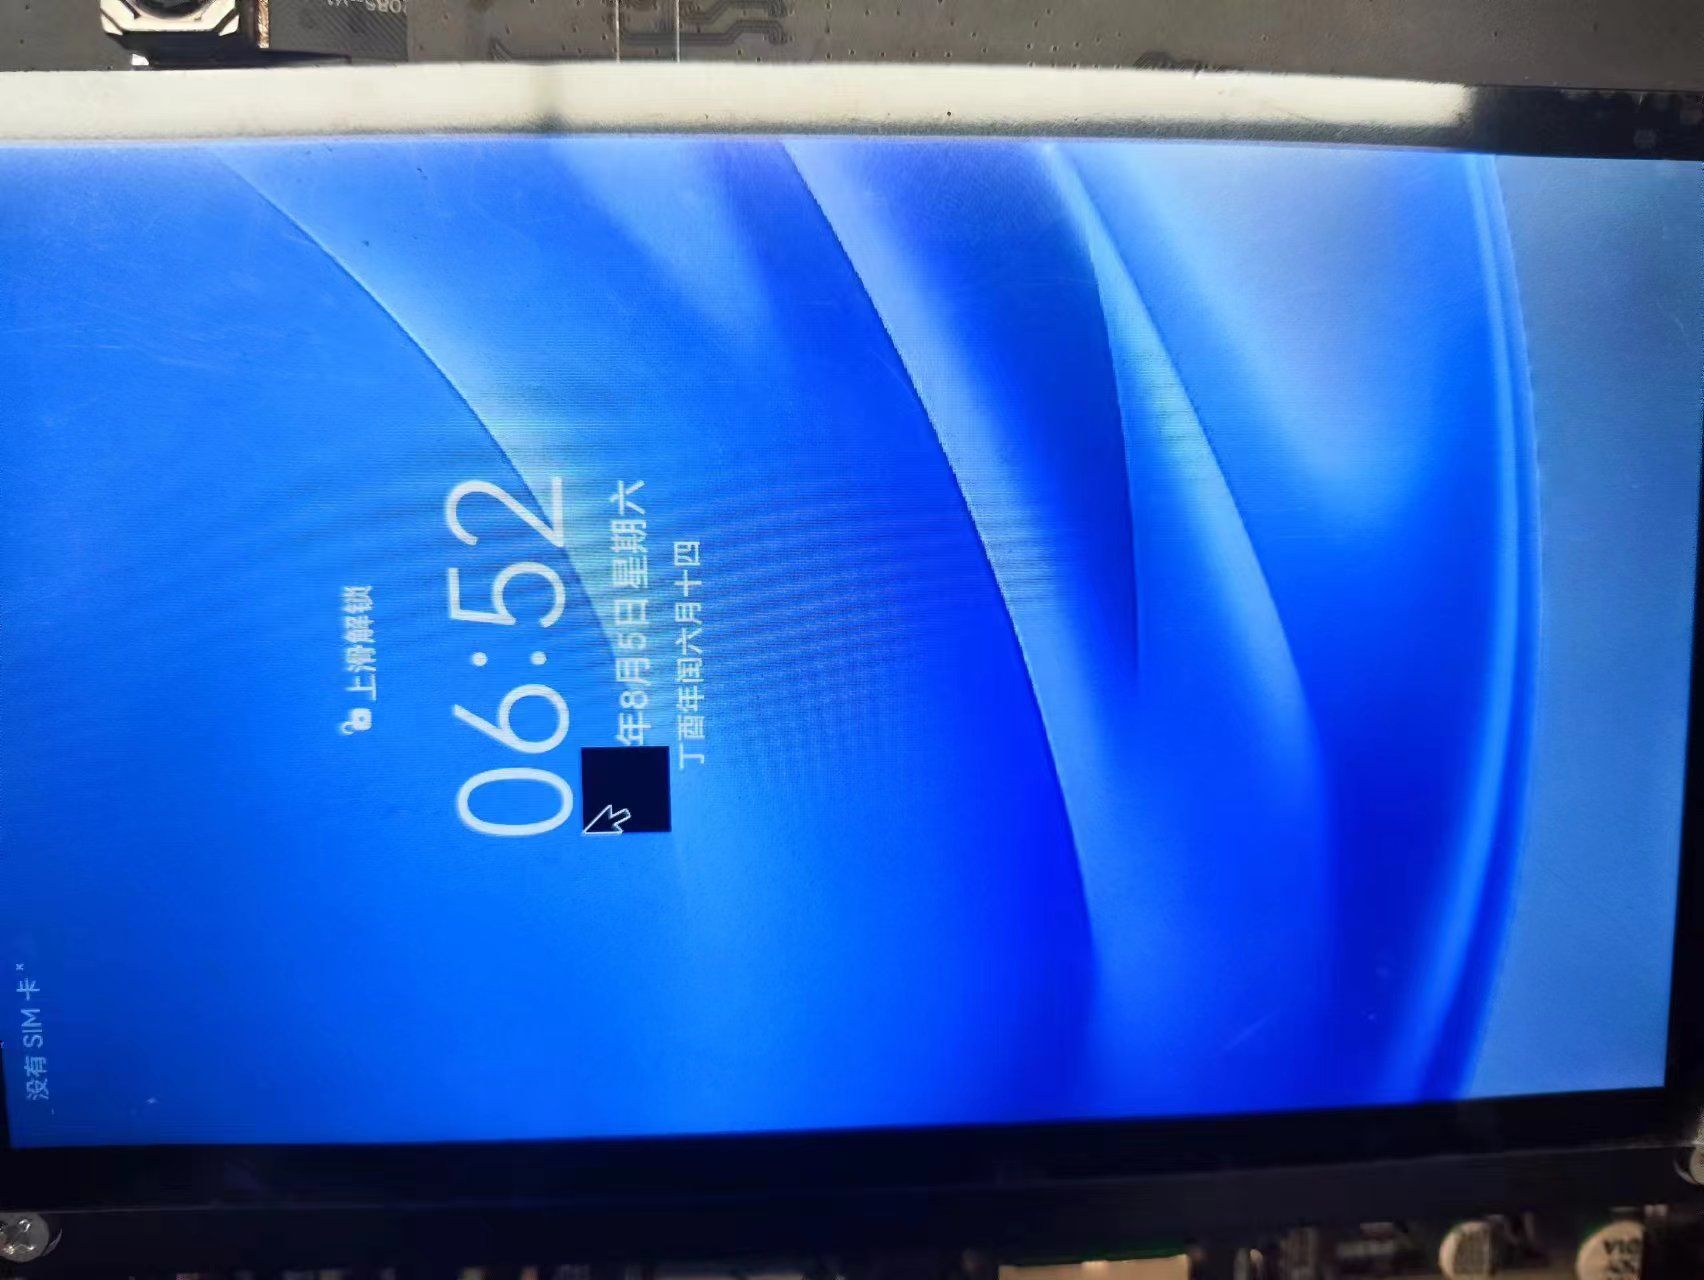
Cluster图层与鼠标相关,如果缺少Cluster图层则会导致如下情况:
更多推荐
 已为社区贡献10条内容


所有评论(0)